Click to highlight a time slot for the patient that you want to display.
Click the Recalls ![]() button on the Scheduling Toolbar.
button on the Scheduling Toolbar.
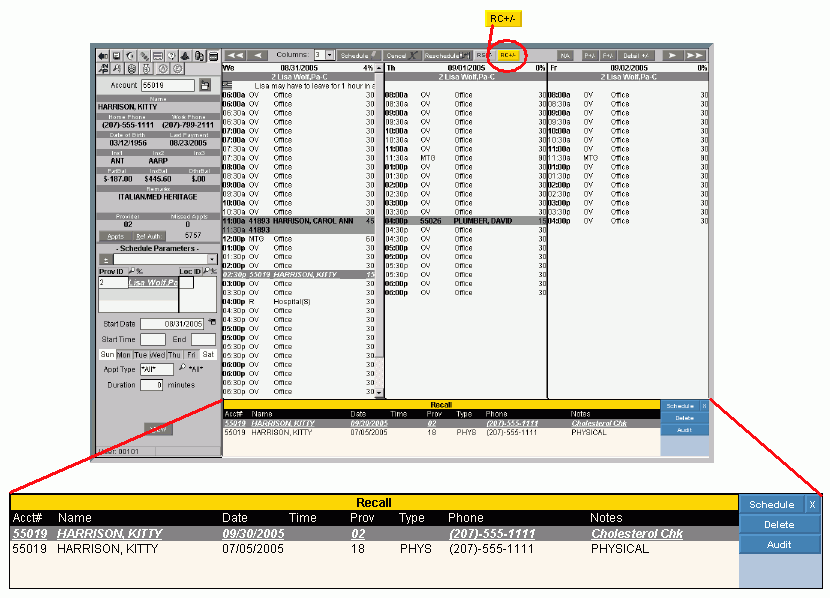
Scheduling Window - Recalls List Area
Use the Recalls List Area in Scheduling to view the list of recalls for the patient and to schedule an appointment for a specific recall, if applicable. The table following the window example describes the Patient Recalls List Area for the Scheduling Window.
Tips:
The Appointment Detail Area, the Recalls List Area, and the Reschedule Appointments List Area share the same space in the Detail Panel at the bottom of the Scheduling Window.
To shift the Detail Panel to the top of the Scheduling window, press [CTRL + u]. To shift it back to the bottom, press [CTRL + u] again.
A User Scheduling Preference setting determines if the Detail Panel displays automatically when you open Scheduling.
You can maintain Patient Recalls during Patient Entry at the Recall Logging Window.
Directions:
To display the Recalls List Area in the Scheduling Window:
Click to highlight a time slot for the patient that you want to display.
Click the Recalls ![]() button on the Scheduling Toolbar.
button on the Scheduling Toolbar.
Scheduling Window - Recalls List Area Example:

|
Scheduling Window - Recalls List Area Prompts Tip: To see more information about a field, click the hyperlink for the field name. |
|
|
Patient Recall Detail |
The following information displays for each recall:
|
|
|
To schedule an appointment for the recall, click to highlight the desired patient recall and click Schedule. Keyboard shortcut: [ALT + s] Notes:
|
|
|
To delete a patient recall, click to highlight the appropriate recall line and click Delete. |
|
|
To view the patient recalls audit trail, click Audit. Tip: To close the Audit window when finished viewing, click Note: For more information, see the Recall Audit Trail Window. |
|
|
To close the Patient Recall List Area:
|