Opening the Recurring Appointment Scheduler, click More.
1. Open Scheduling
to display the Appointment
Book Area.
Tip: To limit the display of appointment times in
the schedule, maintain the Scheduling
Parameters.
2. To open the Recurring Appointment Scheduler Window:
3. Click to highlight an appointment
time slot.
Note: The selected time slot determines the time of
the recurring appointments. However, you can specify different
providers, locations, and dates at the Recurring Appointment Scheduler
Window.
4. Right-click to open the Scheduling Shortcut Menu.
5. From the shortcut menu, click Schedule Recurring.
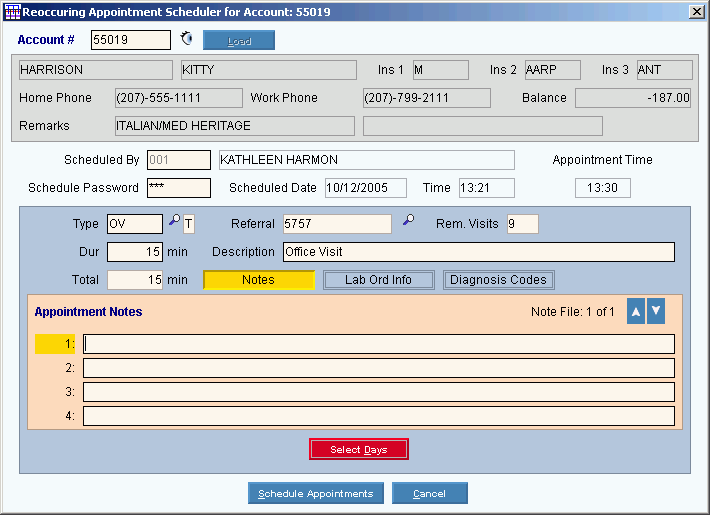
Scheduling - Recurring Appointment Scheduler Window Example:

Recurring Appointment - Select Days Area Example:
Tip: The Select
Days Area displays at the bottom of the window when you click
Select Days ![]() .
.

Creating new Recurring Appointments, click More.
Scheduling - Recurring Appointment Scheduler Window Prompts Tip: To see more information about a field, click the hyperlink for the field name. |
|
Displays the current Patient Account Number if a patient is loaded in the Patient Reference Panel. Required Entry Options: To change the currently displayed patient enter the Account Number and click Load or press [ENTER]. Tips:
|
|
|
To view all of the existing patients, click Search. From the Search list you can select the record to schedule. Tip: The Search is active only if the Account Number is blank. |
|
To load a new patient, enter the Account Number and click Load or press [ENTER]. Keyboard shortcut: [ALT + l] Tip: Load is active only if the Account Number started out blank. |
Displays the patient's last name. |
|
Displays the patient's first name and middle initial. |
|
Displays the first three Insurance Codes for the patient. |
|
Displays the patient's home phone number. |
|
Displays the patient's work phone number. |
|
Displays the patient's current balance amount. |
|
Displays the remarks associated with the patient. |
|
Enter
the Operator ID of the person entering the appointment.
(up to 4 characters) Tips:
|
|
Enter your operator's password to allow you to schedule an appointment, if applicable. (up to 8 characters) Tips:
|
|
Displays the system date as the date the appointment is entered into INSight. |
|
Displays the system time as the time the appointment is entered into INSight. |
|
Displays the time you highlighted in the schedule, which is used for the recurring appointments. |
|
Defaults to the Appointment Type ID for the time slot. You can enter a different Appointment Type ID for the recurring appointments. (up to 4 characters) Required Tips: |
|
Displays the selected Referral Authorization Number. Note:
To select a Referral Authorization Number, click
Search
|
|
Displays the Number of Remaining Visits for the selected Referral Authorization, if applicable. |
|
Defaults to the time slot's duration. You can enter another duration - in minutes. (3.0 numeric) |
|
Total |
Displays the Total amount of time scheduled for the recurring appointments. |
Appointment Type Description |
Default's to the Appointment Description associated with the time slot's Appointment Type ID. You can enter another description. (up to 40 characters) |
|
To maintain optional appointment notes, click Notes. Note: For additional directions, see the Scheduling - Appointment Notes Area. |
|
To maintain the Lab Order Information, click Lab Ord Info. Note: For additional directions, see the Scheduling - Lab Order Information Area. |
|
To maintain the Diagnosis Codes, click Diagnosis Codes. Note: For additional directions, see the Scheduling - Diagnosis Codes Area. |
|
To display the Select Days Area where you can choose the dates for the recurring appointments, click Select Days. Keyboard shortcut: [ALT + d] |
Select Days Area Note: Use the Select Days Area to specify the Providers, Locations, and dates for the recurring appointments. |
|
Specify the Providers to be scheduled. Required Entry Options:
|
|
Providers List |
Displays the list of selected Providers to be scheduled. |
Specify the Specialties for the Providers to be scheduled. This is a time-saver that lets you select all Providers sharing the same specialty at once. Entry Options:
|
|
Specify the Locations to be scheduled. Required Entry Options:
|
|
Locations List |
Displays the list of selected Locations to be scheduled. |
Select All? |
Specify if you want to see the Error Window for providers who cannot be scheduled.
|
Prompt Forces? |
Specify if you want to be prompted for any appointment that must be forced into a reserved time slot that already has a scheduled appointment.
|
Prompt Overrides |
Specify if you want to be prompted for appointments that must be overridden, because the appointment does not match the time slot.
Tip: For more information, refer to the override conditions. |
Dates List |
The Dates List displays the days selected for the recurring appointments. Tip: To see detailed information about a date, double-click the line in the list. |
Example of Detailed Date Information:
|
|
|
To remove a day from the Dates List:
|
|
To add a day to the Dates List:
Tip: Simply double-click to select the date in the Calendar Pop-Up. Note: Add as many days as required. |
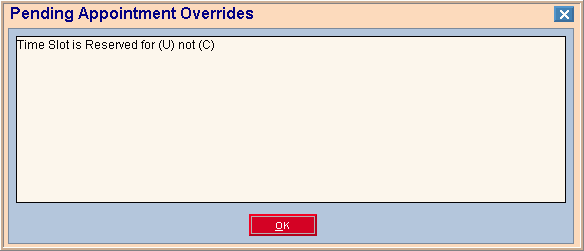
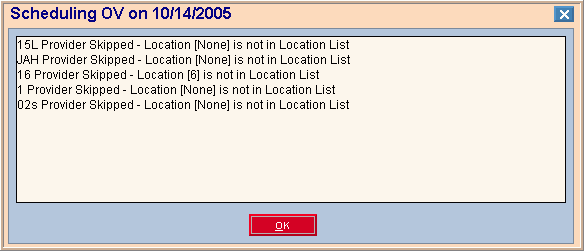
Error Notice: If there is a problem with scheduling the recurring appointments, you will see the following window when you click Add Days. Click OK to continue.
|
|
|
To commit the appointments to the schedule, click Schedule Appointments. Keyboard shortcut: [ALT + s] |
|
To close the window without scheduling the recurring appointments, click Cancel. Keyboard shortcut: [ALT + c] |
Editing existing Recurring Appointments, click More.
Deleting an existing Recurring Appointment, click More.

