Cycle Processing Procedure
The Cycle Processing Procedure contains a guide to help you run the cycle process in the correct sequence. It contains brief instructions and tips for running both the GUI and CURL programs that need to be performed to complete the cycle processing.
Tip: In addition, you can use an abbreviated Cycle Processing Checklist to guide you as to the steps for the process.
a. Finish entering the registration data that you want to include in the cycle.
b. Run the Vehicle Receipts Journal to proof and balance the work being posted.
From the GUI menu, click Daily Work, Vehicle Receipts and Print Journal.
c. When your work is balanced, run the Vehicle Receipts Post to update the files with the registration information to be included in the cycle.
Click Daily Work, Vehicle Receipts and then click Post.
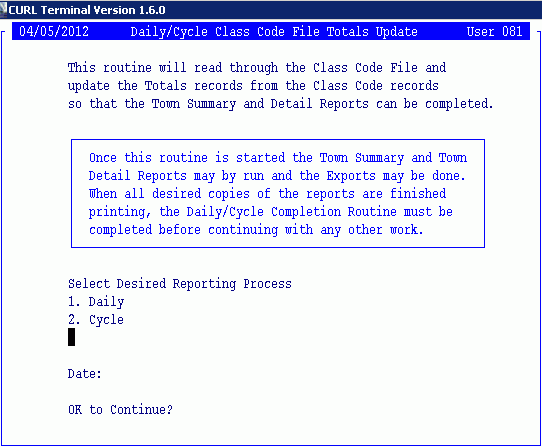
Run the Daily/Cycle Update to update the totals from the class codes. The totals are used for the state reports and exports.
From CURL select 2 for State Reporting I menu and then 20 to display a window similar to this.
Enter 2 for Cycle and then enter Y to continue.
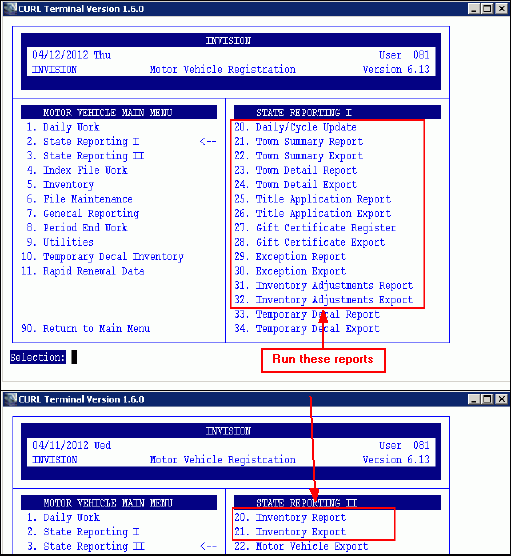
Run the cash reports and associated export routines.
From CURL, run options 21 through 32 of State Reporting I menu and option 20-21 of State Reporting II menu.
Run the Plate Inventory Cycle routine to produce the inventory reports.
From the GUI menu, click Period End and then click Plate Inventory Cycle. The following window displays allowing you to confirm the cycle start and end dates.
Note: These reports can be regenerated until the Plate Inventory Cycle Close is run.

Click Proceed ![]() . Select the printer and the report begins.
. Select the printer and the report begins.
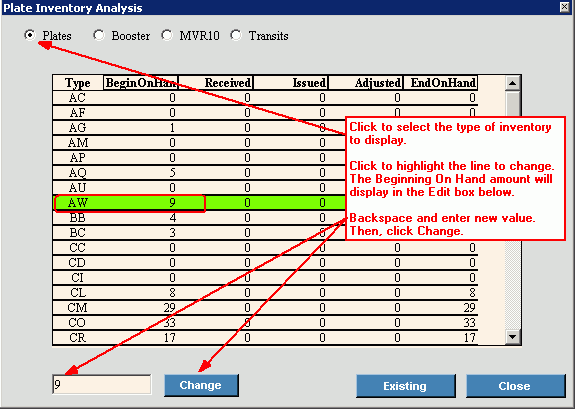
Under special circumstances, you may need to make adjustments to the inventory Beginning On Hand amounts. Use the Plate Inventory Analysis to do this.
From the GUI menu, click Period End and then click Plate Inventory Analysis.
Note: In general, use this feature for inventory adjustments that have special circumstances that can’t be handled through any other MVR routine. If you make adjustments using this routine, you will need to reprint the report that pertains to the type of adjustment you made.
Click to select the type of inventory to display.
Click to highlight the line that needs editing and the Beginning On Hand value displays in the Edit box at the bottom of the window.
Enter the new Beginning on Hand amount.
Click Change ![]() and the End on Hand amount is recalculated.
and the End on Hand amount is recalculated.
These steps allow you to build the registration export file for sending to the BMV.
From GUI Menu Bar click Tools, Export, Electronic Registration and then run the first three steps on the Electronic Registration Export menu.
1. Select Create Work File to build the Export work file. A window similar to below displays:
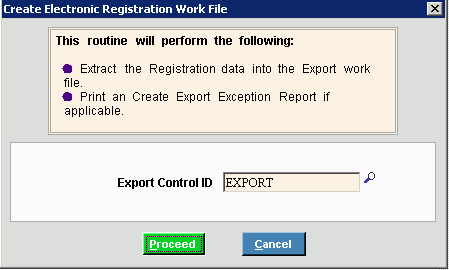
The Export Control ID generally displays from the previous session. You can search for or enter another ID, if needed.
Click Proceed ![]() to begin.
to begin.
2. After the Create Work File is completed, select Data Verification Report to list the 2-part report for proofing the registration data in the work file.
There are no report options. The report simply generates and displays.
To print a hard-copy, right-click and choose Print.
Note: Upon closing the first window, the second part of the report displays.
3. After you have approved the Verification Report, choose Export to create the Export data file. A window similar to below displays:
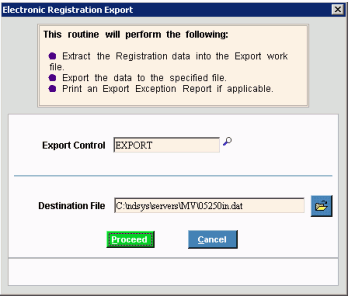
The Export Control ID generally displays from the previous session. You can search for or enter another ID, if needed.
The Destination File identifies the path (location where the export file will be copied to) and file name that is given to the export data file when the export routine is run. You can browse for another Destination File, if appropriate.
Click Proceed ![]() to begin.
to begin.
Follow the steps provided by the BMV to upload the registration data file and export reports. Do not continue until you are sure the export completed successfully.
When the plate inventory reports have been proofed and verified, the next step is to close the plate inventory cycle.
From the GUI Menu bar, click Period End Work and then click Plate Inventory Cycle Close. A window similar to the one below displays:
![]() Important: Once the Plate Inventory Cycle Close is run, you will no longer be able to generate the plate inventory reports or adjustments.
Important: Once the Plate Inventory Cycle Close is run, you will no longer be able to generate the plate inventory reports or adjustments.

Click Proceed ![]() to begin.
to begin.
Once you have proofed and exported all of the necessary reports to the BMV, you can run the Inventory Roll.
From CURL, enter 3 for State Reporting II and then 23 for Inventory Roll and a window similar to below displays.
Note: After you run the Inventory Roll, you can no longer run the cycle reports.
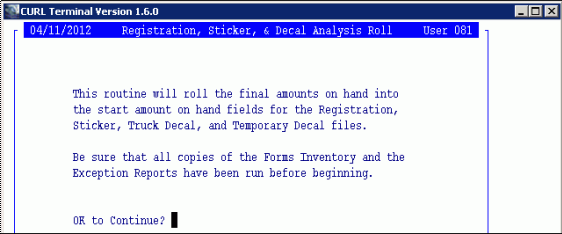
Enter Y to begin.
The final step of the Cycle process is to run the Cycle Close. From CURL, enter 3 for State Reporting II and then enter 24 for Daily/Cycle Completion to display the following window.
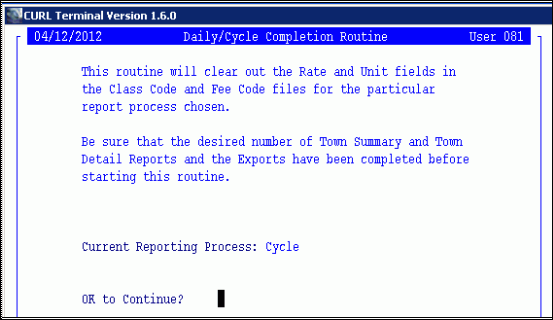
Confirm the current reporting process is Cycle and then enter Y to continue. When Done displays the Cycle Close is complete.