Opening Account Master Maintenance, click More.
-
Basic Method (from the G/L Module):
-
Click File Maintenance from the Menu Bar.
-
Click Account Master.
Tip: Or, use the keyboard shortcut: [ALT] [m] [a].
-
Advanced Methods (from the G/L Module):
-
Click Account Master Maintenance
 on the Toolbar.
 -
Or, click the following sequence:
View from the Menu Bar; and Account Master.
Keyboard shortcut: [ALT] [v] [a] -
Or, use the keyboard shortcut: [CTRL + a].
-
Advanced Method (from another NDS Module):
-
Click General Ledger from the Menu Bar.
-
Click File Maintenance.
-
Click Account Master.
Tip: Or, use the keyboard shortcut: [ALT] [g] [m] [a].
Note: To activate the General Ledger menu in another module, the G/L Application Control must be set up for the module during installation.
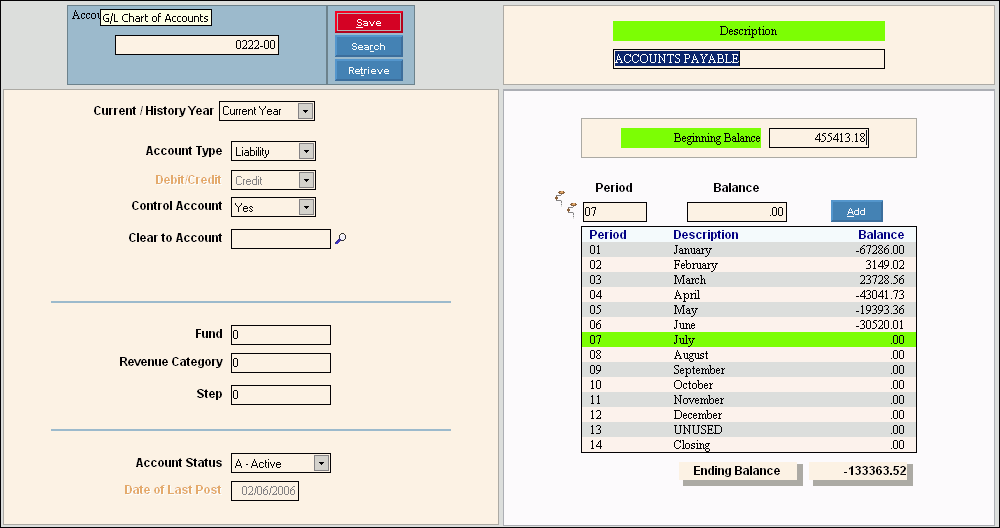
Account Master Maintenance Window Example:

Creating a new G/L Account, click More.
To create a new record choose one of these methods:
-
Enter the new Account Number and click Retrieve
 , or press
[ENTER].
Keyboard shortcut: [ALT + t] -
Or, enter the new Account Number and click File from the Menu Bar; next click New.
Keyboard shortcut: [ALT] [f] [n]
Tip: To
indicate that you are building a new Account, New  displays near the Account Number. Default
entries display and the first field is highlighted
to let you know you can begin entering information.
|
Account Master Maintenance Prompts Tip: To see more information about a field, click the hyperlink for the field name. | |
|
Enter the G/L Account Number. (format varies) Required Tips:
| |
|
|
To update the new or changed information, click Save or press [ENTER]. Keyboard shortcut: [ALT + s] |
|
To avoid losing data, you must save new or changed records. | |
|
|
To view all of the existing accounts:
To view the history for all of the accounts:
|
|
|
To display an existing account, enter the Account Number and click Retrieve, or press [ENTER]. Keyboard shortcut: [ALT + t] |
|
Enter the Account Description. (up to 30 characters) | |
|
To specify which Fiscal Year you want to display in the Period Balances List, click one of the following options in the drop-down list.
| |
|
To specify an Account Type, click one of the options in the drop-down list. Account Types include Asset, Liability, Net Worth, Income, and Expense. | |
|
The Debit/Credit Option specifies if amounts are posted to the account as debits or credits. Click one of the options in the drop-down list. Notes:
| |
|
Specify if this is a Control Account, which is an account used by interfaces from other software modules. Typical Control Accounts include Accounts Receivable, Accounts Payable, Inventory, and Payroll Tax accounts. (No/Yes) Options:
| |
|
For an income or expense account, enter the Clear To Account Number, to which accounts are cleared during the Year-End process. Tips:
| |
|
Enter the Fund number, which is a category number that lets you select groups of accounts for the Trial Balance Report. (4.0) Tip: This optional field is typically used by municipalities that have the Fund Accounting module installed. | |
|
If you use Revenue Categories for customers in the Accounts Receivables module, enter the Revenue Category that is associated with this Account Number. (3.0) Tip: This field is typically used by municipal sites that have the Accounts Receivables module installed. | |
|
Enter the optional Step Number, which is used to select accounts for the year-end Clear and Close Accounts process. (2.0) | |
|
To specify if the account is A(ctive) or I(nactive), click the option in the drop-down list. Tip: You cannot enter or post transactions for inactive accounts. | |
|
Displays the date of the last post, which is updated by Post Journal Entries. | |
|
Period Balance List The Period Balance List displays the account balances for each period of the selected year (current or history). Tip: Although the General Ledger maintains the balances automatically, on rare occasions you may need to make corrections. | |
|
Displays the Beginning Balance for the account. (12.2)
| |
|
You can maintain the account's balance for a specific period, print the Single Period Activity Report for a specific period, or print the YTD Activity Report for a specific period. Directions:
| |
|
|
To see detail for an account balance, you can print the account's activity by clicking the appropriate Drill-Down icon.
|
|
Displays the balance for the selected period. (9.2)
| |
|
|
To update the balance for a selected period, click Add or press [ENTER]. Keyboard shortcut: [ALT + a] |
|
Period Balance List |
The Period Balance List displays the following fields in each row for the specified year for the displayed account: Tip: To select a period for maintenance or to print the report, click to highlight a row. |
|
Displays the calculated Ending Balance for the account, which is the sum of the Beginning Balance and the Period Balances for the displayed year. Tip: You can not directly change the Ending Balance. It is always a calculated value. | |
Editing an existing G/L Account, click More.
 CAUTION: To
avoid losing data, you must save new or changed records.
-
To display the record to be changed, enter the Account Number and click Retrieve
 , or press [ENTER].
Keyboard shortcut: [ALT + t]
Tip: If you do not know the Account Number, you can click Search to see
a list of G/L Accounts.
 -
To position the pointer to the information that you want to change, press [TAB] or click the field using the mouse.
-
Enter the data changes.
-
To complete the edit process, click Save
 , or press [ENTER].
Keyboard shortcut: [ALT + s]
Deleting an existing G/L Account, click More.
-
To display the record to be deleted, enter the Account Number and click Retrieve
 , or press [ENTER].
Keyboard shortcut: [ALT + t]
Tip: If you do not know the Account Number, you can click Search to see a list of General Ledger Accounts.
-
Click File from the Menu Bar, and next click Delete.
Keyboard shortcut: [ALT] [f] [d] -
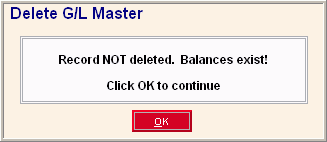
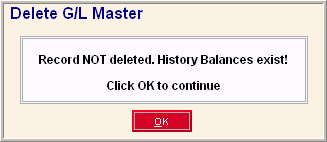
If the account has any current or history balances, you can not delete the account. You will see one of the following warning messages.


Click OK to escape from the delete routine without deleting the record. -
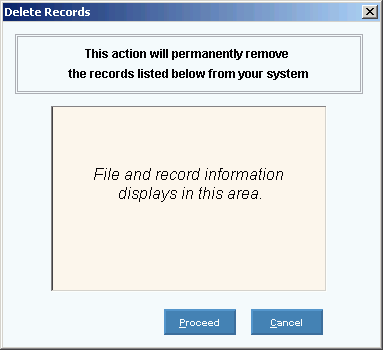
At the Delete Records prompt, click Proceed to delete the record, or click Cancel to escape from the delete routine.
Example:
Note: After you click Proceed, you will see the following message on the Status Bar.
