Bill Entry
Use Bill Entry to enter and edit bills and billing transactions for customers. It can also be used to verify and to edit billing information imported during the Import Readings/Create Transactions routine. It is important to verify that imported readings are correct so that your billing detail on customer statements is accurate. Entered customer billing transactions do not update the customer's balances until you perform Billing Post.
Notes:
After entering the customer billing transactions, confirm your entries by printing the Edit Journal.
For information about the timing and sequence of daily tasks, see Billing Process.
For information about entering special types of bills, see Bill Entry - Entering Special Bills.
To open Bill Entry:
1. Click Bill
Entry ![]() on the Tool
bar.
on the Tool
bar.
2. Or, from the Billing Explorer click Entry and then click Bill.
3. Or, use the keyboard shortcut: [ALT] [y] [b] [e].
Bill Entry Window Example:
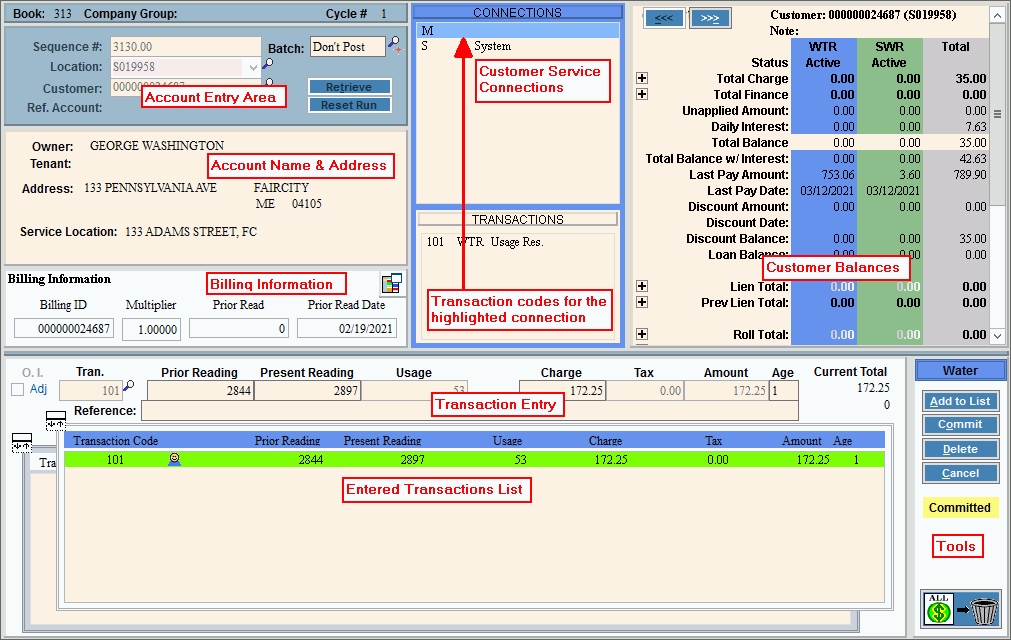
Bill Entry - Transaction Details Entry Area Prompts
|
|
Enter the billing run information which includes the billing cycle and the billing run dates. |
|
Billing Entry Summary |
Here is a summary of the billing transaction entry. Each step is explained below. 1. From the customer entry area, retrieve the displayed sequence number or enter a customer ID or a location ID. 2. Accept the displayed transaction code or enter another transaction code, if applicable. 3. Accept the prior reading or enter a new prior reading, if this is a usage transaction. 4. Enter or edit the present reading, if this is a usage type transaction. 5. Confirm the charge amount and tax amount, if applicable. 6. Confirm the age for the transaction. 7. To complete the billing
transaction, press [Enter] or
click Add to List 8. When all billing transactions
for the service connection are entered, click Commit
List |
|
The book number, company group and cycle # for the billing run displays for your reference.
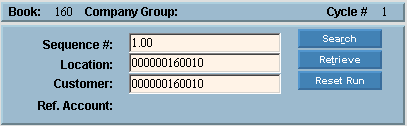
Bill Entry - Customer Entry Area Example:
|
|
You can call up customers in sequence number order, or by location or by customer. Note: Customers are included in the billing run, only if they have matching book numbers, company numbers and cycle numbers as specified by the billing run for the billing run. To determine why a customer is excluded from the billing run, see Bill Entry - Customer and Billing Run Comparison window.
Entry Options:
|
|
To assign the transaction to a batch, enter the batch ID. Or, leave blank to omit a batch for the transaction. To find a batch to assign to the transaction,
click Search |
|
|
To
change the billing run, click |
Customer InformationThe owner and tenant names, addresses, account balances, and their billing elements (meters, meter trailers and components) and their transaction profiles. If billing transactions have already been entered and committed, the billing transaction detail displays in yellow and can be edited. |
|
Billing Information Area |
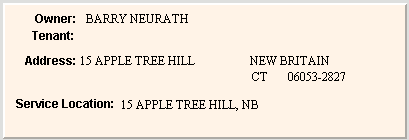
Customer billing information that may be used to generate billing transactions displays. Also, within this area you have the option to edit the billing run dates for an individual customer, if applicable. Bill Entry - Customer Billing Information Area Example:
|
Name, Address Area |
The name and address area shows the customer's name, any tenant name (if applicable), the service location address, and the customer's mailing address. Bill Entry - Customer Name and Address Area Example:
|
Service Connections Area |
The service connection items to be billed and the associated transaction codes display in 2 lists. The first list is the Service Connections list that identifies the types of service connections for the customer and the inventory items associated with the service connection. The second list identifies the transaction codes to generate billing transactions for the service connection currently highlighted in the Service Connection List. Note: If the customer has multiple meters or multiple components, the order they appear in the Service Connection List is determined by the customer's service connection sequence code.
Bill Entry - Customer Service Connections Area Example:
|
Service Connection List |
Reference Type - Displays the service connection reference type to identify the type of services being billed. Customer Service connections are Reference Types are listed in the order shown below. Associated Inventory Items: 1. Reference Type L displays Location IDs. 2. Reference Type M displays Meter IDs. 3. Reference Type T displays Meter Trailer IDs. 4. Reference Type C displays Component IDs. 5. Reference type S displays system references not associated with a device (for example, trade discounts).
Inventory Items - Displays the inventory item. |
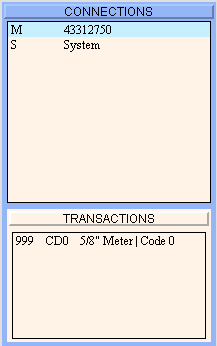
Transactions List |
Displays the following information for your reference:
|
Transaction EntryUse the Transaction Details Entry area to enter and edit the billing details. Generally, you enter all the billing detail transactions for the customer's first service, then commit the detail lines. Then you can enter the billing transactions for the customer's next service. Continue until the billing for all services have been entered and committed. Tips:
|
|
Displays the first transaction code assigned to the customer's billing element. Another transaction code to generate the billing transaction can be entered if needed. Notes:
|
|
If the transaction code requires usage, the customer's prior reading displays. This can be edited, if necessary. (10.0 numeric) Note: If the transaction code's calculation type is set to Flat or to Enter Charge, the cursor skips to the charge field. |
|
Enter the present reading that is used to determine usage. (10.0 numeric) |
|
Displays the difference between the prior reading and the present reading as the usage or consumption. This field can not be edited. |
|
Displays the calculated charge amount, if applicable. This can be edited, if needed. (7.2 numeric) Charge Notes:
|
|
Displays the calculated tax amount, if applicable. (7.2 numeric) |
|
The billing transaction total amount, which is calculated by adding together the charge amount and the tax amount displays. This field cannot be edited. |
|
Displays the default age for the transaction code. This can be edited, if needed. (4.0 numeric) Tip: Typically, you will accept the default age displayed. |
|
Current Total |
Displays an accumulated total of the billing detail amounts committed for the customer. This field cannot be edited. |
Enter a reference for the billing transaction, if applicable. (up to 240 characters) |
|
|
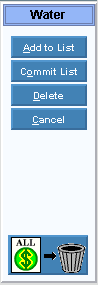
To complete the billing transaction detail line, press [ENTER] or click Add to List. Keyboard shortcut: [ALT + a]
Or,
to cancel transaction before adding to the Transactions List,
click Cancel Keyboard shortcut: [CTRL + c] Note: The completed detail line displays in the Billing Transaction Detail list which is now highlighted. The cursor returns to the Tran. Code field for you to add another line or you can complete the billing transactions for the customer's billing element by clicking Commit. See below. |
|
To complete entry for the customer's service after all detail lines are entered, click Commit List. Keyboard shortcut: [CTRL + o] If the customer has multiple billing elements or services, billing for the next billing element or service is automatically started. The next transaction code to be billed displays in the Tran. Code field and if the service connection is a meter the prior reading displays. To enter charges for the next billing element, repeat the above steps. Continue until the billing transactions for all services have been entered and committed. |
Editing Transactions |
Editing Uncommitted and Committed Billing TransactionsNote: Billing transactions can be edited as many times as necessary until the Billing Post is performed. 1. From the Transaction Detail List area, click to highlight the desired billing transaction line to change. 2. Click the field to change. 3. Enter the data changes. 4. To complete the edit
process, click Editing Posted Billing TransactionsDuring Bill Entry you can enter a reversing charge, perform the Billing Post and next enter the correct bill. For detailed directions, see EDIFICE Bill Reversal Instructions. Note: NDS recommends using this method to provide a complete audit trail. |
Deleting Transactions |
Deleting Uncommitted and Committed Billing TransactionsUse these steps to delete uncommitted or committed billing transactions. To delete Posted billing transactions, see below.
Deleting Posted Billing TransactionsDuring Bill Entry you can enter a reversing charge, perform the Billing Post and next enter the correct bill. For detailed directions, see EDIFICE Bill Reversal Instructions. Note: NDS recommends using this method to provide a complete audit trail. |
Tools AreaBill Entry - Tools Example:
|
|
Actions |
|
![]()
 .
.
 .
Or, to prevent the billing transactions from being deleted,
click
.
Or, to prevent the billing transactions from being deleted,
click