Quick Bar: Overviews (More)---Patient---SSN_Validation---Choose Appointment---Demographics---Contacts---Info---Comments---Diagnosis---Workers'_Comp---Workers' Comp_User-Defns---Remarks---Referral/Phys---Guarantor---Employer---Insurances---Remove_Images---Add_Images---Print_Forms
Patient Wizards - Choose Appointment Area
Use the Choose Appointment Area to specify which appointment is applicable for check in. The table following the window example describes the Choose Appointment Area for the Patient Wizards.
Tips:
For general information about the Wizard menu, window layout, and navigation, see the Wizard - Introduction.
For more information about working with data in fields, see Data Entry Guidelines.
Directions:
To display the Data Entry Area for the Choose Appointment step:
Follow the opening instructions for the appropriate Patient Wizard.
Navigate to the Choose the Appointment step.
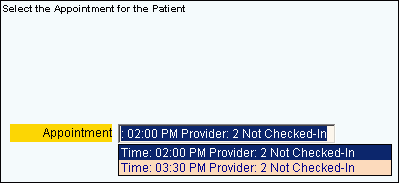
Patient Wizards - Choose Appointment Area Example:
|
Patient Wizards - Choose Appointment Area Prompts Tip: To see more information about a field, click the hyperlink for that field name. |
|
|
Appointment |
Click the appropriate appointment in the drop-down list. Tips:
|
|
|
To display the previous step, click Back. Keyboard shortcut: [ALT + b] |
|
|
To display the next step, click Next or press [ENTER]. Keyboard shortcut: [ALT + n] Tip: For more information about navigating among steps, see the Wizard - Navigation topic. |
|
|
To validate and save the data for all of the Wizard steps, click Finish. The Wizard window closes when the save is complete. Keyboard shortcut: [ALT + s] |
|
|
To close the Wizard without validating or saving the data, click Close. |
![]()